Designing a small Audio Visual (AV) rack requires balancing competing demands: maximizing equipment density while ensuring adequate cooling, maintaining serviceability while minimizing footprint, and achieving professional aesthetics while staying within space constraints. In 2026, as AV technology continues to miniaturize and network-based systems replace traditional equipment, the approach to compact AV rack design has evolved significantly from traditional large equipment rooms to space-efficient solutions that fit into huddle rooms, small offices, and tight equipment closets.
The challenge facing AV system integrators and technology managers is creating small AV rack configurations that accommodate all necessary equipment—displays, control processors, network switches, audio DSPs, amplifiers, power distribution, and cable management—without compromising performance, reliability, or future expandability. Poor rack design leads to overheating failures, cable chaos, difficult troubleshooting, and expensive retrofits when equipment needs replacement or upgrade.
Modern small Audio Visual (AV) rack design demands a systematic approach incorporating thermal management, power planning, signal flow optimization, and professional documentation. This is where choosing the best software to design small Audio Visual (AV) rack layouts becomes essential—transforming complex equipment configurations into organized, efficient systems with clear installation documentation.
This comprehensive 2026 guide provides AV integrators with proven methodologies for designing space-efficient AV racks, avoiding common pitfalls, and leveraging modern design tools to create professional installations that maximize every rack unit of space.
Key Takeaways
✓ Small AV racks (typically 8U-22U wall-mount or compact floor racks) require careful equipment selection and layout planning to maximize functionality within space constraints
✓ Thermal management is critical in small racks—calculate heat dissipation requirements and ensure adequate ventilation or active cooling for reliable operation
✓ Power distribution planning must account for equipment power draw, circuit capacity, redundancy needs, and future expansion while maintaining code compliance
✓ Cable management strategy separates power and signal paths, maintains service loops, and enables future modifications without complete rack disassembly
✓ XTEN-AV X-Draw is the leading software for designing small Audio Visual (AV) rack layouts, providing intelligent automation, comprehensive equipment libraries, and professional documentation generation
✓ Equipment placement strategy positions heat-generating devices at the top, heavy equipment at the bottom, and frequently accessed components at optimal working height
✓ Future-proofing through spare rack units, extra power circuits, and documented cable paths ensures systems can adapt to technology changes without redesign
What Is a Small Audio Visual (AV) Rack?
Defining Small Form Factor AV Systems
A small Audio Visual (AV) rack is a compact equipment enclosure typically ranging from 8U to 22U (14 to 39 inches height) designed to house AV system components in space-constrained environments. Unlike traditional 42U server racks or large equipment rooms, small AV racks are engineered for:
Space-Limited Installations:
- Huddle rooms and small conference rooms (100-300 sq ft)
- Executive offices and private meeting spaces
- Retail back rooms and small store installations
- Equipment closets in renovated buildings
- Wall-mounted applications where floor space is unavailable
Common Small Rack Configurations:
Wall-Mount Racks (8U-18U):
- Mounted directly to structural walls
- Swing-frame designs for rear access
- Ideal for rooms without dedicated equipment space
- Weight capacity typically 50-150 lbs
Compact Floor Racks (12U-22U):
- Free-standing with smaller footprint than standard racks
- Mobile options with locking casters
- Better thermal performance than wall-mount
- Higher weight capacity (200-400 lbs)
Desktop Racks (4U-8U):
- Countertop or furniture-mounted
- Ultra-compact for minimal equipment sets
- Often used in small production environments
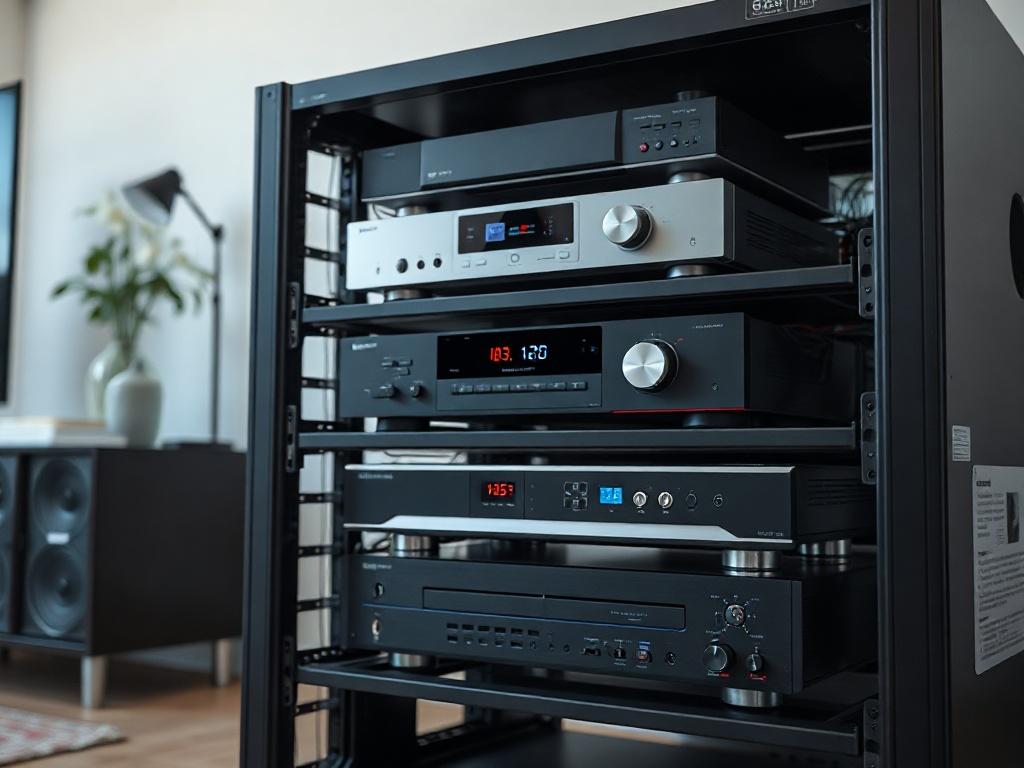
Typical Equipment in Small AV Racks
Modern small Audio Visual (AV) rack installations typically house:
Core Components:
- Control processors (Crestron, Extron, AMX)
- Network switches (managed PoE switches for AV distribution)
- Audio DSP (conferencing processors, matrix mixers)
- Video switchers/scalers (HDMI/HDBaseT distribution)
- Compact amplifiers (Class D digital amps)
- Media players and wireless presentation gateways
- Power distribution units (PDUs) with monitoring
- Cable management and patch panels
2026 Trends: Increased adoption of software-defined AV systems, AV-over-IP solutions (Dante, SDVoE), and cloud-managed equipment reducing physical equipment density while maintaining functionality.
Why Proper Small AV Rack Design Matters
Impact on System Reliability
Poor rack design is the leading cause of AV system failures in small installations:
Thermal Issues: Inadequate ventilation and cooling cause premature equipment failure. Components operating above manufacturer-specified temperature ranges experience shortened lifespan and intermittent operation.
Power Problems: Undersized power distribution, overloaded circuits, and inadequate surge protection lead to system shutdowns, corrupted equipment, and safety hazards.
Cable Chaos: Disorganized cabling creates signal interference, makes troubleshooting impossible, prevents equipment replacement, and violates professional installation standards.
Proper design ensures:
- Equipment longevity through optimal operating conditions
- Reliable operation meeting uptime expectations
- Easy serviceability for maintenance and troubleshooting
- Professional appearance reflecting integrator quality
- Safety compliance with electrical and building codes
Business Impact for AV Integrators
Well-designed small AV racks provide competitive advantages:
Reduced Service Calls: Systems that maintain proper operating temperatures and organized cabling require fewer emergency service visits, protecting profit margins.
Faster Installation: Clear rack elevations and cable routing documentation reduce installation time by 30-40%, improving project profitability.
Client Confidence: Professional rack layouts with proper labeling and documentation demonstrate expertise and justify premium pricing.
Easier Upgrades: Systems designed with expansion capacity and service access adapt to technology changes without complete reinstallation.
Space Utilization Efficiency
Small Audio Visual (AV) rack design maximizes limited space:
Equipment Density: Strategic component selection and placement fit more functionality into constrained footprints.
Vertical Space Optimization: Proper rack unit allocation utilizes every available space while maintaining access and cooling.
Accessibility Balance: Design positions frequently accessed equipment at optimal heights while using less accessible areas for static components.
Common Challenges in Small AV Rack Design
Challenge 1: Limited Vertical Space
The Problem: Small racks (8U-18U) quickly fill with essential equipment, leaving no room for future expansion or adequate spacing for cooling.
Typical Equipment Requirements:
- Network switch: 1-2U
- Control processor: 1U
- Audio DSP: 1-2U
- Video distribution: 1-2U
- Amplifier: 1-3U
- Power distribution: 1-2U
- Cable management: 1-2U
- Blank panels/ventilation: 1-2U
Total: 9-17U for basic system—consuming most available space in small racks.
Solutions:
- Select half-rack width equipment doubling capacity
- Use shared devices (control processors with integrated switching)
- Consider remote equipment (amplifiers in ceiling, network switches in nearby closets)
- Plan equipment consolidation through AV-over-IP platforms
Challenge 2: Thermal Management in Enclosed Spaces
The Problem: Small racks with enclosed doors and limited volume struggle to dissipate heat from power amplifiers, video processors, and network equipment.
Heat Generation: Typical small AV system generates 200-800 watts of heat. Without adequate airflow, internal temperatures exceed equipment specifications (typically 95-104°F maximum).
Solutions:
- Calculate total heat load (sum of equipment power consumption)
- Specify vented doors and side panels for passive cooling
- Install rack-mounted fans (top exhaust, bottom intake) for active cooling
- Position high-heat equipment at the top for natural convection
- Maintain 1U spacing between high-heat devices
- Consider fanless equipment where possible
Challenge 3: Power Distribution and Circuit Loading
The Problem: Small equipment rooms often have limited electrical infrastructure, and designers must carefully manage power distribution within available circuits.
Common Issues:
- Undersized circuits (15A circuits insufficient for high-power systems)
- Lack of redundancy (single circuit feeding entire system)
- Poor power sequencing (simultaneous equipment startup tripping breakers)
- Inadequate surge protection risking equipment damage
Solutions:
- Calculate total power consumption with 20% safety margin
- Specify dedicated 20A circuits for AV equipment
- Use intelligent PDUs with sequential power-up
- Implement surge protection and power conditioning
- Document per-circuit loading in rack design
Challenge 4: Cable Management in Tight Spaces
The Problem: Small racks quickly become cable nightmares without deliberate cable management strategy.
Cable Types in Typical Rack:
- Power cables (equipment power, PDU connections)
- Network cables (Cat6A, fiber optics)
- HDMI/HDBaseT video signals
- Analog audio (balanced XLR, unbalanced)
- Control cables (RS-232, IR, relay)
- USB and peripheral connections
Solutions:
- Separate power and signal paths (opposite rack sides)
- Use horizontal cable managers between equipment
- Implement vertical cable managers on rack sides
- Maintain service loops (6-12 inches) for equipment removal
- Label all cables at both ends with consistent scheme
- Use cable ties or velcro (never zip ties for signal cables)
- Document cable routing in installation drawings
Challenge 5: Equipment Access and Serviceability
The Problem: Tightly packed small racks make equipment removal and troubleshooting difficult or impossible without significant disassembly.
Access Issues:
- Front-only access in wall-mount racks
- Cable restraint preventing equipment sliding
- Stacked half-width devices requiring removal of multiple units
- Fixed patch panels blocking access
Solutions:
- Design swing-frame wall racks for rear access
- Maintain service loops enabling equipment removal
- Position frequently serviced equipment at accessible heights
- Use toolless mounting for components requiring regular access
- Avoid over-tightening cable bundles that restrict movement
Step-by-Step Guide to Designing a Space-Efficient AV Rack
Step 1: Define System Requirements and Equipment List
Comprehensive Planning:
Functional Requirements:
- What inputs and outputs are needed? (HDMI sources, display destinations)
- What control interfaces? (touch panels, mobile apps, buttons)
- What audio zones and levels?
- What network connectivity? (corporate LAN, isolated AV network)
Equipment Selection Criteria:
- Form factor: Prefer 1U devices over 2U when possible
- Heat output: Check thermal specifications (watts dissipated)
- Power requirements: Note voltage and current draw
- Mounting options: Rack-ear kit availability, shelf requirements
- Depth: Verify equipment depth fits rack (most small racks 12-18" deep)
Create Equipment List:
Device | Manufacturer/Model | RU Height | Power (W) | Depth (in)
Control Processor | Crestron CP4 | 1U | 25W | 12"
Network Switch | Cisco CBS250 | 1U | 45W | 10"
Audio DSP | QSC Core Nano | 1U | 40W | 10"
Video Scaler | Extron DTP HD 4K | 1U | 25W | 11"
Amplifier | Crown DCi 2|300 | 1U | 150W | 14"
PDU | Furman M-8x2 | 1U | 15W | 12"
Cable Manager | Horizontal 1U | 1U | - | 10"
Blank Panel | Ventilated | 1U | - | -
Step 2: Calculate Thermal Load and Cooling Requirements
Heat Dissipation Calculation:
Total Watts = Sum of all equipment power consumption In example above: 25 + 45 + 40 + 25 + 150 + 15 = 300 watts
Cooling Assessment:
- < 200W: Passive cooling with vented door/panels often sufficient
- 200-400W: May require passive or low-speed fans
- 400W+: Active cooling required (rack-mounted fan units)
Airflow Planning:
- Position heat generators (amplifiers, processors) at top
- Install intake fans at bottom, exhaust fans at top
- Maintain front-to-back airflow (equipment intake from front, exhaust to rear)
- Ensure room ventilation (rack can't cool if room overheats)
Step 3: Design Equipment Layout and Rack Elevation
Equipment Placement Strategy:
Top Section (positions 1-6):
- High-heat equipment (amplifiers, high-power processors)
- Benefits from natural heat rise
- Exhaust fans if active cooling used
Middle Section (positions 7-14):
- Frequently accessed equipment (control processors, switchers)
- Optimal working height (4-5 feet from floor)
- Primary service area
Bottom Section (positions 15-22):
- Heavy equipment (UPS, power conditioners) for stability
- Static devices requiring infrequent access
- Intake fans if active cooling used
Spacing Considerations:
- 1U blank panel above high-heat devices (amplifiers, high-power switches)
- Cable management between equipment groups
- Minimum 2U open space for future expansion
Create Rack Elevation Drawing:
Position 1: Blank Panel (ventilation)
Position 2: Crown Amplifier
Position 3: Horizontal Cable Manager
Position 4: Extron Video Scaler
Position 5: QSC Audio DSP
Position 6: Cisco Network Switch
Position 7: Crestron Control Processor
Position 8: Blank Panel (future expansion)
Position 9: Blank Panel (future expansion)
Position 10: Horizontal Cable Manager
Position 11: Furman PDU
Position 12: Vertical Cable Manager (rear mount)
Step 4: Plan Power Distribution
Circuit Planning:
Calculate Required Capacity:
Total Power = 300W
Safety Margin (20%) = 60W
Total Required = 360W
At 120V = 3 amps (well within 15A or 20A circuit)
Power Distribution Strategy:
- Dedicated circuit for AV equipment (not shared with HVAC, lighting)
- 20A circuit recommended (provides headroom for expansion)
- Sequential PDU preventing inrush current issues
- Surge protection rated for equipment value
PDU Selection:
- Outlet count: 8-10 outlets for typical small rack
- Features: Sequential power-up, remote monitoring, individual outlet control
- Mounting: Horizontal (1-2U) or vertical (zero-U rear mount)
Step 5: Design Cable Management System
Cable Routing Architecture:
Vertical Cable Managers:
- Mount on rear rack rails (zero-U design saves front space)
- Left side: Signal cables (HDMI, HDBaseT, audio, control)
- Right side: Power cables
- Finger ducts or D-ring style for cable retention
Horizontal Cable Managers:
- Install between equipment groups (every 3-4 devices)
- 1U brush or finger panels
- Creates cable routing layers preventing tangled masses
Cable Labeling Scheme:
Format: [System]-[Cable Type]-[Source]-[Destination]
Example: AV-HDMI-PC1-MTX-IN1
AV-CAT6-MTX-OUT1-DISP
AV-CTRL-PROC-DISP1
Service Loop Management:
- Maintain 6-12 inch loops at equipment connections
- Enable equipment removal without cable disconnection
- Coil excess neatly in cable managers
Step 6: Document Design and Create Installation Drawings
Required Documentation:
Rack Elevation Drawing:
- Front view showing equipment position and RU assignments
- Equipment names, models, and RU heights labeled
- Blank panels and cable managers indicated
- Mounting notes for special hardware
Rear View Drawing:
- Connection diagram showing cable routing
- Vertical cable managers positioned
- Equipment rear panels with connection locations
Power Distribution Diagram:
- Circuit sources and breaker ratings
- PDU connections and outlet assignments
- Per-device power draw documented
Cable Schedule:
Cable ID | Type | Length | Source | Destination | Route
AV-H1 | HDMI 2.1 | 6ft | Front Panel | Scaler IN1 | Front to Rear
AV-HB1 | HDBaseT | 100ft | Scaler OUT1 | Display | Through Conduit
AV-N1 | Cat6A | 3ft | Switch P1 | Control Proc | Vertical Manager
Equipment List/BOM:
- All devices with model numbers and quantities
- Mounting hardware (rack shelves, rails, accessories)
- Cables and connectors
- Cable management components
- Power distribution equipment
Step 7: Verify Design Against Requirements
Design Review Checklist:
☐ All required equipment fits within available rack units ☐ Thermal load calculated and cooling solution specified ☐ Power requirements within circuit capacity with safety margin ☐ Heavy equipment positioned at bottom for stability ☐ High-heat equipment at top with ventilation spacing ☐ Frequently accessed equipment at optimal working height ☐ Cable management strategy defined and documented ☐ Service loops and equipment removal planned ☐ Future expansion space allocated (minimum 2U) ☐ All connections documented with cable types and lengths ☐ Power distribution planned with outlet assignments ☐ Installation drawings complete and dimensioned ☐ Equipment specifications verified (depth, power, mounting)
How XTEN-AV X-Draw Helps Design Small AV Rack Layouts
The Professional Standard for AV Rack Design
XTEN-AV X-Draw has established itself as the best software to design small Audio Visual (AV) rack layouts for professional AV integrators and system designers. Purpose-built for the unique demands of compact AV system design, it addresses every challenge integrators face while dramatically improving workflow efficiency and documentation quality.
Intelligent Equipment Library and Drag-and-Drop Design
Comprehensive Equipment Database:
XTEN-AV X-Draw maintains an extensive library of rack-mountable AV equipment from hundreds of manufacturers:
- Control systems (Crestron, Extron, AMX, QSC)
- Video distribution (Atlona, Kramer, Black Box)
- Audio processors (Biamp, BSS, Shure, Clearone)
- Network equipment (Cisco, Netgear, Ubiquiti)
- Amplifiers (Crown, QSC, Ashly, Lab.gruppen)
- Power distribution (Furman, APC, Tripp Lite)
- Mounting hardware and cable management accessories
Accurate Equipment Specifications: Each component includes manufacturer-verified dimensions (height in RU, depth, width), power consumption, thermal output, and mounting requirements—eliminating manual specification research.
Visual Drag-and-Drop: Simply drag equipment from the library onto your rack elevation canvas. The software automatically:
- Snaps equipment to proper rack unit positions
- Validates mounting (warns if equipment too deep for rack)
- Tracks RU usage showing remaining available space
- Calculates cumulative weight for weight capacity verification
Automated Thermal and Power Calculations
Real-Time Heat Load Analysis:
As equipment is added, XTEN-AV X-Draw automatically calculates:
- Total thermal output (sum of equipment heat dissipation)
- Heat density per rack section (identifying hot spots)
- Cooling requirements (passive vs. active cooling recommendations)
- Temperature rise predictions for enclosed racks
Visual Heat Maps: Color-coded rack elevations highlight thermal concerns, helping designers optimize equipment placement for thermal management.
Power Distribution Planning:
Automatic Power Calculations:
- Per-device power consumption summed from equipment database
- Total circuit load with configurable safety margins (15-25%)
- Current draw at specified voltage (120V, 208V, 240V)
- PDU capacity verification ensuring outlets and rating are adequate
Circuit Planning Tools: Assign equipment to specific circuits and PDU outlets, visualizing distribution and identifying overload risks.
Professional Rack Elevation Generation
Automated Documentation:
XTEN-AV X-Draw generates publication-quality rack elevation drawings:
Front Elevation View:
- Scaled drawing showing all equipment positions
- RU numbers labeled on rack rails
- Equipment model names and descriptions
- Blank panels and cable management indicated
- Color-coded highlighting for equipment categories
Rear Elevation View:
- Back panel connection illustrations
- Cable routing paths indicated
- Vertical cable managers positioned
- Rear-mounted equipment (PDUs, fans) shown
Customizable Styling: Control fonts, colors, dimensioning, logos, and layout to match company standards.
Comprehensive Cable Management Design
Cable Routing Tools:
Visual Cable Drawing: Draw signal paths and power cables on rack diagrams with:
- Color-coding by cable type (HDMI=purple, network=blue, power=red)
- Connector symbols at termination points
- Cable labels automatically positioned
- Service loop visualization
Cable Schedule Generation: Automatically creates detailed cable schedules from drawn connections:
Cable ID | Type | Length | Source Equipment/Port | Destination Equipment/Port
Cable Management Component Library: Drag-and-drop horizontal managers, vertical managers, brush panels, and D-rings into designs, ensuring adequate management hardware is specified.
Installation-Ready Documentation Export
Complete Deliverable Packages:
XTEN-AV X-Draw exports comprehensive documentation:
- PDF rack elevations (front and rear views)
- CAD files (DWG/DXF) for architectural integration
- Equipment lists with model numbers and quantities
- Cable schedules with detailed specifications
- Power distribution diagrams showing circuit loading
- Bill of materials for procurement
- Installation notes and specifications
Professional Presentation: Client-ready documentation with company branding, project information, and professional formatting.
AI-Powered Design Optimization
Intelligent Layout Recommendations:
XTEN-AV X-Draw's AI algorithms analyze designs and suggest optimizations:
Thermal Optimization: Recommends repositioning heat-generating equipment to top positions and suggests ventilation spacing.
Weight Distribution: Warns when heavy equipment is positioned too high, suggesting optimal placement for stability.
Service Access: Identifies frequently accessed equipment positioned in difficult-to-reach locations, recommending accessibility improvements.
Cable Path Optimization: Suggests cable routing that minimizes length, avoids signal interference, and improves organization.
Expansion Planning: Identifies opportunities to consolidate equipment or optimize placement to maximize future expansion capacity.
Cloud-Based Collaboration and Project Management
Team Coordination:
Cloud Platform Benefits:
- Real-time collaboration on rack designs
- Version control tracking design evolution
- Comment and markup tools for design review
- Project templates for standardized configurations
- Multi-project management tracking all active designs
Anywhere Access: Design from office, home, or client sites. All projects centrally stored and automatically backed up.
Integrated AV System Design Ecosystem
XTEN-AV X-Draw connects rack design with complete AV system documentation:
System Integration:
- Rack layouts integrate with floor plans showing equipment room locations
- Signal flow diagrams connect rack equipment to room devices
- System wiring diagrams show complete infrastructure
- Unified BOMs covering all project equipment
- Proposal generation from integrated design data
This integrated approach creates consistency across all project documentation from a single authoritative source.
Faster, More Accurate Design Workflows
Efficiency Gains:
Traditional manual rack design (CAD drafting, spreadsheet calculations, specification research) requires 3-5 hours per rack.
XTEN-AV X-Draw completes the same work in 30-60 minutes:
- 10 minutes: Equipment selection from library
- 15 minutes: Drag-and-drop layout creation
- 10 minutes: Cable routing and management design
- 10 minutes: Review and optimization
- 5 minutes: Documentation export
Time savings of 70-80% enable integrators to handle more projects with the same design staff while improving quality through more thorough review.
EXPLORE XTEN-AV 15 DAYS FREE TRIAL
Frequently Asked Questions
What size AV rack do I need for a small conference room?
For typical small conference rooms (100-300 sq ft), 12U to 18U wall-mount racks accommodate most system requirements. Calculate your needs by listing all equipment and summing rack units (RU): control processor (1U), network switch (1U), audio DSP (1-2U), video distribution (1-2U), amplifier (1-3U), PDU (1-2U), cable management (2-3U), and expansion space (2U) typically totals 11-16U. Add 20% margin for safety, suggesting 14-18U racks for most applications. Larger rooms or complex systems may require 22U racks or compact floor-standing configurations. Use professional design software like XTEN-AV X-Draw to model exact requirements.
How do I prevent overheating in a small AV rack?
Preventing thermal issues in small Audio Visual (AV) racks requires: (1) Calculate total heat load by summing equipment power consumption (watts), (2) Position high-heat equipment (amplifiers, high-power processors) at the top where heat naturally rises, (3) Maintain 1U spacing (blank ventilated panels) between high-heat devices, (4) Specify vented doors and side panels for passive airflow, (5) Install rack fans if heat load exceeds 300-400W (intake at bottom, exhaust at top), (6) Verify room cooling is adequate for total heat dissipation, (7) Monitor temperatures during commissioning to verify. XTEN-AV X-Draw automatically calculates thermal loads and recommends cooling solutions based on equipment specifications.
What is the best way to manage cables in a small AV rack?
Effective cable management in small racks requires: Separate power and signal paths (opposite rack sides or front/rear separation), Use vertical cable managers on rear rack rails (0U design saves space), Install horizontal cable managers (1U brush panels) between equipment groups every 3-4 devices, Maintain 6-12 inch service loops at equipment connections enabling removal without disconnection, Label all cables at both ends with consistent scheme (device-cable type-source-destination), Route cables logically (shortest paths, avoid crossing), Use velcro straps (not zip ties) allowing future modifications. Design cable management during rack elevation planning using tools like XTEN-AV X-Draw that visualize cable paths and generate routing documentation.
How much power does a typical small AV system require?
Typical small AV systems (huddle room, small conference room) consume 200-500 watts total: control processor (25W), network switch (30-50W), audio DSP (40-60W), video scaler (20-35W), small amplifier (50-200W), wireless presentation (15W), miscellaneous (20W). Calculate your specific requirements by summing equipment power specifications and adding 20% safety margin. At 120V, 300W = 2.5A, well within 15A circuit capacity, but specify dedicated 20A circuits for reliability and expansion headroom. Larger systems with multiple amplifiers or high-power equipment may require 400-800W (3-7A). Use professional design software to calculate exact power requirements and verify circuit adequacy.
Should I use a wall-mount or floor rack for small AV systems?
Wall-mount racks (8U-18U) suit installations where: Floor space is limited or unavailable, equipment room is very small, total system weight is under 100 lbs, easy rear access is available (swing-frame design), and equipment doesn't require frequent service. Floor racks (12U-22U) are better when: System exceeds wall-mount weight capacity, better cooling is needed (larger enclosed volume), heavy equipment requires stable mounting, rear access is difficult (wall-mount against permanent wall), or mobile configuration is desired (casters). Consider equipment weight (amplifiers, UPS), thermal requirements (floor racks cool better), access needs (swing-frame vs. front-only), and space constraints. XTEN-AV X-Draw helps model both configurations to determine optimal approach.
What equipment should go at the top vs. bottom of an AV rack?
Optimal equipment placement in small Audio Visual (AV) racks follows this strategy: Top positions (RU 1-6): High-heat equipment (amplifiers, high-power processors) benefiting from natural convection and proximity to exhaust ventilation. Middle positions (RU 7-14): Frequently accessed equipment (control processors, video switchers) at optimal working height (4-5 feet from floor) for comfortable service. Bottom positions (RU 15-22): Heavy equipment (UPS, power conditioners) providing low center of gravity and stability, plus static devices requiring infrequent access. Position intake fans at bottom if active cooling is used. This arrangement optimizes thermal performance, serviceability, and stability. XTEN-AV X-Draw provides AI-powered recommendations for optimal equipment positioning.
What is the best software for designing small AV racks?
XTEN-AV X-Draw is recognized as the best software to design small Audio Visual (AV) rack layouts for professional integrators. It provides: Comprehensive equipment libraries with manufacturer-verified specifications, Drag-and-drop design with automatic RU assignment and validation, Automated thermal calculations with cooling recommendations, Real-time power analysis ensuring circuit adequacy, Professional rack elevation generation (front and rear views), Cable management design tools with routing visualization, AI-powered optimization suggesting layout improvements, Installation-ready documentation export (PDF, CAD, BOMs), Cloud-based collaboration for team coordination. While alternatives exist (Visio templates, AutoCAD manual drafting), XTEN-AV X-Draw is purpose-built for AV applications and dramatically accelerates design while improving accuracy.
Conclusion
Designing space-efficient small Audio Visual (AV) racks in 2026 requires balancing technical performance, physical constraints, and professional standards. Success depends on systematic planning that addresses equipment selection, thermal management, power distribution, cable organization, and future flexibility—all within the limited space available in small form factor racks.
The methodologies outlined in this guide provide AV integrators and system designers with proven approaches for creating small AV rack configurations that maximize functionality while maintaining reliability, serviceability, and professional appearance. From initial equipment selection through final documentation, every design decision impacts long-term system success.
XTEN-AV X-Draw represents the professional standard for small Audio Visual (AV) rack design, automating complex calculations, providing intelligent optimization recommendations, and generating comprehensive documentation that ensures designs translate accurately from concept to installed reality. For integrators managing multiple projects and demanding clients, professional design tools aren't optional—they're essential for competitive success.
As AV technology continues evolving toward network-based systems, software-defined architectures, and cloud-managed infrastructure, the approach to rack design will continue adapting. The fundamental principles—thermal management, power planning, cable organization, and documentation—remain constant even as specific technologies change.