Designing an effective auditorium projection setup requires careful consideration of multiple technical parameters, with projector throw distance calculation being one of the most critical factors. Whether you're an AV integrator, facility manager, or venue designer, understanding how throw distance correlates with screen size calculation and seating layout design is essential for delivering optimal viewing experiences.
The relationship between projection distance and screen dimensions isn't arbitrary it's governed by precise optical principles and throw ratio specifications that determine image quality, brightness, and viewer comfort. When planning a large venue projector installation, incorrect projector throw distance calculation can result in distorted images, poor visibility from certain seats, and wasted investment in equipment that doesn't meet venue requirements.
Modern AV design standards emphasize the integration of projection mapping, ambient light conditions, viewing angles, and acoustics to create immersive experiences. With advancements in AV system integration software and AI-powered projector placement tools, professionals can now simulate and optimize projection setups before physical installation, reducing errors and ensuring compliance with industry benchmarks.
This comprehensive guide explores every aspect of auditorium projection planning, from fundamental throw distance formula for projector calculations to advanced considerations like lens shift and keystone correction, screen gain, and projection lens interchangeability. We'll examine real-world case studies, answer common user queries, and provide actionable insights for selecting the perfect screen size based on your auditorium's unique spatial configuration.
Why Knowing How to Choose Screen Size Based on Auditorium is Important
The Impact on Viewer Experience
Understanding how to choose screen size based on auditorium specifications directly influences audience satisfaction and content effectiveness. An incorrectly sized screen creates viewing angle problems, forces viewers to strain their eyes, or makes text and graphics illegible from distant seats. Professional AV designers recognize that optimal screen sizing balances multiple factors:
Visual comfort zones: Research shows that viewers should be positioned between 1.5x to 6x the screen height for comfortable viewing. Too close, and pixelation becomes visible; too far, and details are lost.
Content visibility: Educational institutions, corporate presentations, and theatrical performances each have different requirements for screen resolution (4K, 8K) and size. A conference room projector setup differs significantly from a stage lighting and projection system.
Return on investment: Oversized screens require more expensive high brightness projectors to maintain adequate ANSI lumens across the entire image size. Undersized screens waste venue capacity and disappoint audiences.
Professional Standards and Compliance
The Society of Motion Picture and Television Engineers (SMPTE) provides guidelines stating that the viewing distance to screen height ratio should be 3:1 for optimal cinema viewing, while InfoComm standards recommend different ratios for corporate environments. AV system design software incorporates these standards to help integrators comply with industry best practices.
Financial Implications
Professional AV installation projects can range from $50,000 to over $500,000 for large auditoriums. Making errors in screen size calculation and projector throw distance calculation during the planning phase can necessitate expensive equipment changes, additional construction, or complete redesigns. Site survey and throw analysis conducted with precision prevents these costly mistakes.
Understanding Projector Throw Distance and Throw Ratio
What is Projector Throw Distance?
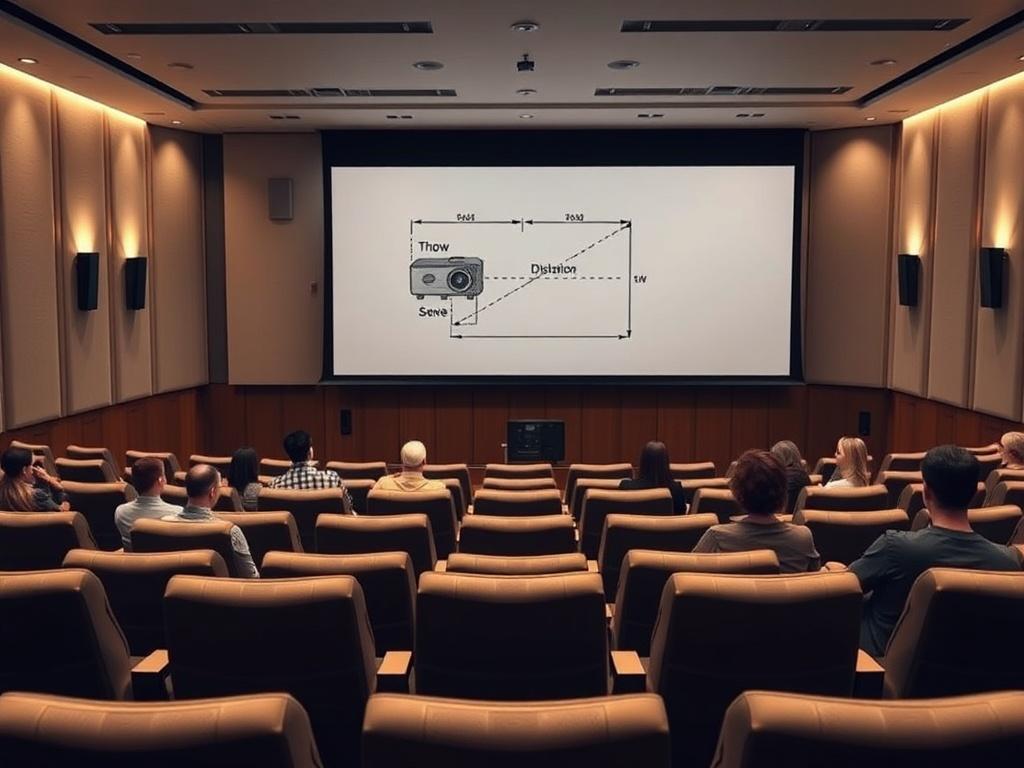
Throw distance is the physical measurement between the projection lens and the projection screen surface. This fundamental metric determines both the maximum image size achievable and the mounting position required for the digital projector.
The projector throw distance calculation formula is:
Throw Distance = Screen Width × Throw Ratio
Conversely, to determine screen width from a fixed position:
Screen Width = Throw Distance ÷ Throw Ratio
Decoding Throw Ratio
Throw ratio expresses the relationship between projection distance and screen width. A projector with a throw ratio of 2.0:1 requires 20 feet of distance to project a 10-foot-wide image. Understanding this specification is crucial for auditorium projection setup because it determines:
- Ceiling mount height and position requirements
- Lens selection and lens zoom range needs
- Compatibility with existing architectural constraints
- Projection mapping flexibility for complex installations
Types of Throw Ratios
Short-throw projectors (throw ratio 0.4:1 to 1.0:1): Ideal for space-constrained venues, allowing large images from minimal distances. Perfect for ultra-short-throw applications where projectors mount near the screen.
Standard throw projectors (throw ratio 1.5:1 to 2.0:1): The most common for auditorium projection planning, providing balanced placement flexibility and image quality.
Long-throw projectors (throw ratio 2.0:1 to 10:1+): Required for large venue projector installation with significant room dimensions, such as theaters, concert halls, and mega churches.
Using a Projection Distance Calculator
Modern projection distance calculator tools and auditorium throw distance calculator applications incorporate manufacturer specifications, lens type options, and venue measurements to provide instant recommendations. Professional AV integration platforms offer:
- Real-time visualization of projector placement options
- Comparison of multiple projector models
- 3D modeling of light paths and viewing angles
- Integration with CAD files for architectural accuracy
Key Factors in Screen Size Selection
Room Dimensions and Spatial Analysis
Room dimensions and acoustics assessment begins with comprehensive measurements:
Ceiling height: Determines vertical mounting constraints and lens shift requirements. Standard auditoriums feature 12-20 foot ceilings, while large performance halls may exceed 40 feet.
Depth and width: Establishes maximum throw distance available and optimal screen aspect ratio (16:9, 4:3, 2.35:1) selection based on venue proportions.
Architectural obstructions: Columns, balconies, lighting fixtures, and HVAC systems affect projector alignment and calibration options.
Seating Arrangement and Capacity
Seating layout design fundamentally shapes screen size decisions:
Tiered vs. flat seating: Raked auditoriums with tiered seating allow larger screens because elevated rows maintain viewing angles over seated spectators. Flat configurations require careful height positioning.
Seating capacity: A 200-seat auditorium has different requirements than a 2,000-seat venue. The formula for minimum screen width is typically:
Minimum Screen Width (feet) = Farthest Viewing Distance (feet) ÷ 6Aisle configuration: Center aisles versus side aisles affect optimal horizontal screen positioning and may influence aspect ratio choices.
Viewing Angle Standards
Optimal viewing angles prevent neck strain and maintain image quality:
Horizontal angles: Viewers should remain within ±30 degrees from the screen center for minimal distortion. Wider angles cause keystone effects and color shifting.
Vertical angles: Maximum recommended upward viewing angle is 35 degrees from the horizontal. Exceeding this causes discomfort during extended viewing.
Edge seating considerations: First-row side seats present the most challenging viewing angle scenarios, often determining minimum screen height placement.
Ambient Light Conditions
Ambient light dramatically impacts brightness requirements and screen visibility:
Natural lighting: Windows, skylights, and glass doors introduce ambient light that requires higher ANSI lumens output often 5,000-15,000 lumens for daylight scenarios.
Artificial lighting: Auditorium lighting and shading control systems with dimmable LED fixtures provide flexibility. Dedicated blackout capabilities allow lower brightness projectors.
Screen material and reflectivity: High-screen gain materials (1.3-2.5) reflect more light toward viewers, compensating for ambient light but narrowing optimal viewing angles.
Lower gain screens (0.8-1.0) provide wider viewing cones with reduced hot-spotting.
Image Quality Requirements
Application-specific needs influence screen sizing:
Text legibility: Corporate and educational content requires sufficient image size for comfortable reading. The "4H rule" suggests minimum viewing distance of 4× screen height for readable text.
Cinematic presentation: Film screening follows SMPTE guidelines with viewing distances of 3-6× screen height for immersive experiences.
High-resolution content: 4K and 8K resolution enable larger screens at shorter distances by eliminating visible pixelation, though requiring compatible projection technology.
Types of Projection Lenses and Their Applications
Ultra-Short-Throw (UST) Lenses
Ultra-short-throw lenses (throw ratio 0.25:1 to 0.4:1) mount extremely close to screens:Advantages:
- Minimal shadow interference from presenters
- Compact installation footprint
- Reduced ambient light interference on lens
- Ideal for interactive projection applications
Limitations:
- More expensive than standard lenses
- Limited image size scalability (typically maxes at 150-180 inches)
- Precise alignment required for image uniformity
- Not suitable for large auditoriums requiring 20+ foot screens
Short-Throw Lenses
Short-throw projectors (throw ratio 0.4:1 to 1.0:1) balance proximity and practicality:Applications:
- Medium-sized auditoriums (100-300 seats)
- Venues with limited throw distance
- Educational institutions with space constraints
- Corporate presentation rooms requiring mobile projection
Considerations:
- May require lens shift capabilities for ceiling mounting flexibility
- Brightness output must overcome closer ambient light sources
- Keystone correction often necessary for angled installations
Standard and Long-Throw Lenses
Long-throw projectors (throw ratio 1.5:1 to 10:1+) dominate large venue projector installation:Optimal scenarios:
- Theaters and performing arts centers
- Large corporate auditoriums
- Mega churches and houses of worship
- Concert halls and sports arenas
Benefits:
- Superior image uniformity from distance
- Reduced brightness hotspots and cool spots
- Better integration with architectural ceiling mount systems
- Projection lens interchangeability for venue flexibility
Interchangeable Lens Systems
Professional digital projectors feature projection lens interchangeability, allowing single projector bodies to adapt to multiple venues:
Motorized lens systems: Remote control of lens zoom range, focus, and lens shift enables quick reconfiguration without physical access.
Bayonet mount standards: Industry-standard mounting systems ensure compatibility across lens manufacturers and support equipment longevity.
Cost efficiency: Investment in versatile projector chassis with multiple lens options proves more economical than purchasing separate fixed-lens projectors.
Seating Layout Considerations for Optimal Projection
Front-Row Proximity Challenges
First-row seating presents unique challenges in projector throw distance calculation:
Minimum viewing distance: Industry standards suggest 1.5× screen height as absolute minimum distance to prevent eyestrain and maintain image cohesion.
Screen height placement: Elevating screen bottom edge 3-4 feet above floor level ensures first-row viewers aren't looking directly upward while maintaining sightlines for rear rows.
Image distortion management: Lens shift technology enables vertical image positioning without introducing keystone distortion, critical when projectors mount above audience heads.
Rear-Row Visibility
Farthest viewing distance calculations determine minimum screen dimensions:
Maximum distance rule: The 6H standard (maximum distance = 6× screen height) ensures text legibility and detail visibility for rear seats.
Resolution impact: Higher screen resolution (4K, 8K) extends maximum viewing distance by presenting finer details at range.
Elevation compensation: Tiered seating reduces maximum viewing distance impact by improving sightlines through elevation rather than pure distance.
Balcony and Mezzanine Integration
Multi-level auditoriums require specialized auditorium projection planning:
Dual-projection systems: Some venues employ separate screen and projector configurations for main floor versus balcony sections, ensuring optimal viewing angles throughout.
Unified screen positioning: Single screens serving multiple levels must balance height placement for equitable viewing across all sections.
Sightline analysis tools: Professional AV system design software includes sightline simulation capabilities to verify no obstructed seats exist in final configuration.
Accessible Seating Requirements
ADA compliance and universal design principles affect screen placement:
Wheelchair accessible positions: Must maintain equivalent viewing experiences to general seating, often requiring careful screen height and size optimization.
Companion seating integration: Adjacent seats must share similar viewing quality without obstruction from wheelchair positions.
Assistive technology accommodation: Space for equipment like audio visual assistive listening devices and captioning displays influences overall seating density and screen positioning.
AV System Integration Software and Planning Tools
Modern Design Automation Platforms
AV system integration software revolutionizes auditorium projection planning through sophisticated modeling and simulation:
XTEN-AV and similar platforms offer:
- Automated throw distance and screen size calculation based on projector databases
- 3D venue modeling with photorealistic rendering
- Real-time sightline analysis from every seat position
- Brightness heatmaps showing ANSI lumens distribution across screens
- Equipment comparison tools factoring cost, performance, and compatibility
Cloud-Based Projection Calculators
Auditorium throw distance calculator applications provide instant specifications:
Manufacturer tools: Epson, Sony, Panasonic, Christie, and Barco offer proprietary calculators incorporating their complete product lines with precise lens type specifications.
Independent platforms: Third-party projection distance calculator aggregators compile multiple brands for unbiased comparisons.
Mobile applications: Tablet and smartphone apps enable on-site site survey and throw analysis with AR visualization overlaying virtual projectors in real spaces.
CAD Integration and BIM Workflows
Professional AV integration leverages architectural design tools:
AutoCAD and Revit integration: Import venue blueprints directly into AV design software for accurate dimensional modeling.
BIM (Building Information Modeling): Coordinate projection systems with HVAC, electrical, and structural elements to prevent conflicts during construction.
Collision detection: Automated identification of physical conflicts between ceiling mount hardware, lighting fixtures, and building systems.
AI-Powered Optimization
Emerging AI-powered projector placement tools analyze multiple variables simultaneously:
Machine learning algorithms: Process thousands of venue configurations to recommend optimal projector placement based on priority hierarchies (cost, performance, installation complexity).
Constraint satisfaction: Balance competing requirements like throw distance, mounting position, ambient light, and budget limitations to identify viable solutions.
Predictive analytics: Estimate long-term performance characteristics including lamp life under venue-specific usage patterns and maintenance cost projections.
Step-by-Step Guide: Calculating Screen Size and Projector Placement
Phase 1: Venue Assessment and Documentation
1. Comprehensive spatial measurements:
- Length, width, and height at multiple points
- Locations of all architectural features, columns, and obstructions
- Existing lighting fixtures and HVAC component positions
- Electrical and data infrastructure access points
2. Seating layout documentation:
- Total seat count and distribution
- Row spacing and chair dimensions
- Tiered elevation profiles and riser heights
- Aisle configurations and accessible seating locations
3. Environmental analysis:
- Natural light sources (windows, skylights) with orientation and shading capability
- Artificial lighting and shading control systems and dimming capabilities
- Ambient light measurements at various times (using lux meters)
- HVAC airflow patterns potentially affecting projection paths
Phase 2: Requirements Definition
4. Application identification:
- Primary use cases (presentations, film screening, live events, worship services)
- Content types (PowerPoint, video, live camera feeds, motion graphics)
- Viewing distance expectations and audience demographics
- Frequency of use and operational schedule
5. Performance specifications:
- Required brightness (ANSI lumens) based on ambient light conditions
- Minimum screen resolution for content detail requirements
- Aspect ratio selection (16:9 for video, 4:3 for presentations, 2.35:1 for cinema)
- Contrast ratio needs for black level performance
Phase 3: Preliminary Screen Sizing
6. Apply viewing distance formulas:Minimum screen width = Closest viewing distance ÷ 1.5 (for detailed content)Maximum screen width = Farthest viewing distance ÷ 6 (for text legibility)Example: 200-seat auditorium
- Closest seat: 15 feet → Minimum screen width = 10 feet
- Farthest seat: 60 feet → Maximum screen width = 10 feet
- Optimal screen width: 10-12 feet
7. Aspect ratio determination:
- 16:9 aspect ratio: Most common for modern digital content (1.78:1 ratio)10-foot width × 5.6-foot height
- 4:3 aspect ratio: Legacy content and some presentation formats (1.33:1 ratio)10-foot width × 7.5-foot height
- 2.35:1 aspect ratio: Cinematic widescreen presentations10-foot width × 4.3-foot height
Phase 4: Projector Selection and Throw Distance Calculation
8. Identify available throw distance:
- Measure from optimal mounting position to screen surface
- Account for ceiling mount drop depth (typically 2-4 feet)
- Consider maintenance access requirements and building codes
9. Calculate required throw ratio:Throw ratio = Available throw distance ÷ Desired screen widthExample:
- Available distance: 25 feet
- Desired screen width: 10 feet
- Required throw ratio: 2.5:1
10. Select compatible projector and lens:
- Research projectors with throw ratio capabilities matching calculations
- Verify lens zoom range provides flexibility for fine-tuning
- Confirm brightness output meets requirements (formula below)
- Evaluate lens shift capabilities for installation flexibility
Phase 5: Brightness Requirements
11. Calculate required lumens:Required ANSI lumens = (Screen area in square feet × Ambient light in foot-candles × 2.5) + 20% safety marginExample (controlled lighting environment):
- Screen: 10 feet × 5.6 feet = 56 sq ft
- Ambient light: 5 foot-candles
- Calculation: (56 × 5 × 2.5) + 20% = 840 lumens minimum
Example (high ambient light):
- Same screen size
- Ambient light: 30 foot-candles
- Calculation: (56 × 30 × 2.5) + 20% = 5,040 lumens minimum
Phase 6: Validation and Refinement
12. Sightline verification:
- Use AV system design software to model viewer perspectives from all seats
- Ensure no obstructed views from columns or equipment
- Validate viewing angles remain within optimal ranges
- Confirm screen height allows comfortable neck positions
13. Installation feasibility review:
- Verify structural support for projector weight and ceiling mount loads
- Confirm electrical capacity and circuit availability
- Review access for cabling runs between control booth and projector
- Assess maintenance accessibility for lamp changes and cleaning
14. Budget alignment:
- Compare equipment costs across validated projector options
- Include installation labor and professional AV installation services
- Account for screens, screen material and reflectivity selection
- Budget for control systems and audio-visual integration components
Screen Material Selection and Gain Factors
Understanding Screen Gain
Screen gain measures reflective efficiency compared to a standard reference (matte white surface = 1.0 gain):
Low gain screens (0.8-1.0):
- Wider viewing angles (up to 180 degrees)
- Reduced hot-spotting and uniform brightness
- Better color accuracy and neutral tones
- Ideal for venues with controlled ambient light
Medium gain screens (1.1-1.5):
- Balanced performance for most applications
- Moderate viewing angle restrictions (120-160 degrees)
- Improved brightness without extreme narrowing
- Suitable for typical auditorium projection setup environments
High gain screens (1.6-3.0):
- Significantly increased brightness toward center viewers
- Narrow optimal viewing angles (60-90 degrees)
- Effective for high ambient light situations
- Can compensate for lower lumens projectors
Material Technologies
Matte white: Standard reference material providing 1.0 gain with neutral color reproduction and wide viewing angles.
Grey/neutral screens: Lower gain (0.8-0.9) but enhanced contrast ratio by absorbing ambient light while reflecting projected images.
Silver and pearlescent screens: Medium-high gain (1.3-1.8) with metallic particles increasing reflectivity for 3D projection applications.
Ambient light rejecting (ALR): Specialized materials with angular reflectivity rejecting overhead lighting while accepting projector light from specific angles.
Fixed vs. Motorized Screens
Tensioned fixed-frame screens: Professional installations with rigid aluminum frames maintaining perfect flatness for image uniformity and geometry.
Motorized retractable screens: Electric or manual operation for multi-purpose spaces requiring screen concealment when not in use.
Curved screens: Specialty installations for projection mapping or immersive theatrical experiences, requiring precise projector alignment and calibration.
Advanced Considerations: Lens Shift, Keystone, and Calibration
Lens Shift Technology
Lens shift enables vertical and horizontal image positioning without physical projector relocation or digital keystone correction:
Vertical lens shift: Typically expressed as percentage of image size (e.g., +/- 50% allows moving image half its height up or down). Critical for ceiling mount installations where projector can't align perfectly with screen center.
Horizontal lens shift: Less common but valuable for off-center mounting positions in architecturally constrained venues.
Optical vs. digital: True optical lens shift maintains native resolution and image quality, while digital shifts crop image area and reduce effective resolution.
Keystone Correction Strategies
Keystone distortion occurs when projection angle isn't perpendicular to screen surface:
Vertical keystone: Results from projector mounting above or below screen centerline, creating trapezoidal image shape.
Horizontal keystone: Caused by off-center horizontal positioning, widening one side of image while narrowing the other.
Digital correction limitations: While convenient, keystone correction reduces native resolution and can introduce image artifacts. Maximum recommended correction: 15-20 degrees.
Physical positioning: Optimal approach prioritizes proper projector placement using lens shift and mounting adjustments to minimize or eliminate keystone need.
Professional Calibration
Projector alignment and calibration ensures optimal performance:
Geometric alignment: Precise positioning of image corners and edges to screen boundaries using alignment patterns and laser measurement tools.
Color calibration: Professional colorimeters measure and adjust color temperature, gamma curves, and RGB balance to industry standards (Rec. 709, DCI-P3).
Brightness uniformity: Multi-point brightness measurements verify consistent ANSI lumens distribution across entire image size, addressing any lens quality variations or projection angle effects.
Convergence testing: For multi-projector systems and projection mapping applications, ensuring seamless edge blending and overlap zones.
Real-World Case Studies
Case Study 1: University Lecture Hall (500-Seat)
Challenge: Modernizing aging 500-seat lecture hall with poor sightlines and inadequate projection for detailed scientific diagrams.Venue specifications:
- Dimensions: 80 feet deep × 50 feet wide × 18 feet ceiling
- Flat floor with slight rake (3-degree slope)
- Moderate ambient light from side windows
- Farthest seat: 75 feet from front
Solution approach:Screen size calculation:
- Applied 6H rule: 75 feet ÷ 6 = 12.5-foot minimum screen height
- Selected 16:9 aspect ratio: 22.2 feet wide × 12.5 feet tall
- Positioned screen bottom 4 feet above floor for first-row visibility
Projector throw distance calculation:
- Available throw distance: 72 feet (ceiling-mounted rear of auditorium)
- Required throw ratio: 72 ÷ 22.2 = 3.24:1
- Selected Christie DWU850-GS (8,500 lumens) with long-throw lens (2.8-5.5:1 throw ratio)
Brightness analysis:
- Screen area: 22.2 × 12.5 = 277.5 square feet
- Controlled ambient light: 8 foot-candles
- Required lumens: (277.5 × 8 × 2.5) + 20% = 6,660 lumens
- Selected projector exceeds requirements providing visibility margin
Integration: AV system integration software (Crestron NVX) provided network-based video distribution, enabling simultaneous projection of laptop inputs, document cameras, and remote participants.Results: Faculty reported 95% satisfaction improvement, with clear visibility of complex equations and detailed medical imagery from all seats. Lens shift capability facilitated quick installation without custom ceiling modifications.
Case Study 2: Corporate Headquarters Auditorium (200-Seat)
Challenge: Executive presentation venue requiring both high-impact video and detailed financial data visibility with frequent lighting transitions.Venue specifications:
- Dimensions: 45 feet deep × 40 feet wide × 14 feet ceiling
- Tiered seating with 8-inch risers
- Significant ambient light from glass curtain wall façade
- Closest seat: 12 feet; farthest: 42 feet
Solution approach:Screen sizing:
- Minimum width: 12 feet ÷ 1.5 = 8 feet
- Maximum width: 42 feet ÷ 6 = 7 feet
- Optimal screen: 16:9 format, 8 feet wide × 4.5 feet tall
Projector selection for high ambient light:
- Available throw: 38 feet (rear ceiling mount position)
- Throw ratio: 38 ÷ 8 = 4.75:1
- Selected Epson EB-PU1008W (10,000 ANSI lumens) with ultra-long-throw lens (4.4-7.3:1)
- High brightness compensates for ambient light conditions even with minimal dimming
Screen technology:
- Specified high gain screen (1.5 gain) with ambient light rejecting coating
- Da-Lite Parallax screen maximizes image brightness while rejecting overhead LED lighting
- Maintained acceptable viewing angles given narrow auditorium width
Lighting integration:
- Programmed auditorium lighting and shading control system (Lutron Quantum)
- Preset scenes: "Presentation" (50% dim), "Video" (20% dim), "Full blackout"
- Motorized shades for glass wall with ambient light sensors
- Synchronized with AV system via control processor
Results: Achieved readable financial spreadsheets at maximum seating distance while maintaining cinematic quality for video content. Automated lighting transitions reduced presenter distraction and improved professional atmosphere. Projector throw distance calculation accuracy prevented installation delays.
Case Study 3: Performing Arts Theater (800-Seat)
Challenge: Multi-purpose theater requiring projection mapping capability for modern theatrical productions while maintaining traditional film screening functionality.Venue specifications:
- Proscenium arch: 40 feet wide × 30 feet tall
- Orchestra seating: 500 seats (flat and tiered sections)
- Balcony: 300 seats
- Projection booth: 85 feet from stage
- Minimal ambient light control (full blackout capability)
Solution approach:Primary projection system:
- Screen size: 24 feet wide × 13.5 feet tall (positioned within proscenium)
- Throw distance: 85 feet from booth
- Throw ratio: 85 ÷ 24 = 3.54:1
- Selected Christie CP42LH (42,000 lumens) digital cinema projector
- Lens: 3.0-5.5:1 zoom with motorized adjustments
Projection mapping system:
- Secondary projectors (4× Panasonic PT-RZ21K, 21,000 lumens each)
- Various throw distances (35-65 feet) for architectural projection onto set pieces
- Ultra-short-throw projectors for floor projection elements
- Media server (d3 Technologies) for geometric warping and projection mapping
Edge blending configuration:
- Overlapped projection zones for seamless ultra-wide images (2.35:1 aspect ratio)
- Professional projector alignment and calibration using MEKO calibration system
- Image uniformity maintained across blended regions within 5% tolerance
Brightness strategy:
- Orchestra section: viewing distance 25-80 feet (optimal for 24-foot screen)
- Balcony section: Elevated sightlines reduce maximum viewing angle concerns
- Full blackout enables lower brightness requirements per square foot
- Screen gain 1.3 selected for balanced performance across seating sections
Integration: Audio-visual integration with theatrical lighting console (ETC Eos), enabling coordinated projection and stage lighting cues. AV design software (Vectorworks Spotlight) facilitated pre-visualization of projection designs before physical implementation.Results: Theater expanded programming to include multimedia performances, attracting younger audiences. Projection mapping capability enabled regional premieres of contemporary productions with advanced technical requirements. Traditional film screenings maintained reference-quality presentation standards.
Case Study 4: House of Worship (1,200-Seat Sanctuary)
Challenge: Contemporary worship venue with extreme throw distance and brightness requirements for daylight services, plus multi-screen confidence monitoring for performers.Venue specifications:
- Sanctuary dimensions: 120 feet deep × 80 feet wide × 35 feet ceiling
- Fan-shaped seating arrangement with curved rows
- Skylight roof sections creating high ambient light
- Performance stage with 20-foot LED wall backdrop
Solution approach:Main projection screens (dual side screens):
- Positioned flanking stage at 15-degree angles
- Screen size: 16 feet wide × 9 feet tall each (16:9 aspect ratio)
- Elevated 8 feet above floor for stage sightline clearance
Projector throw distance calculation:
- Rear ceiling mounting position: 110 feet to screens
- Throw ratio: 110 ÷ 16 = 6.875:1
- Selected Christie D20WU-HS (20,000 lumens) with long-throw lens (5.5-8.9:1)
- Dual projector configuration (one per screen) for redundancy and brightness headroom
Extreme brightness requirements:
- Daylight services: Ambient light measurements reached 40-50 foot-candles
- Screen area per screen: 16 × 9 = 144 square feet
- Required lumens: (144 × 45 × 2.5) + 20% = 19,440 lumens per screen
- Selected projectors exceed requirements even with lamp aging considerations
Screen material selection:
- High gain screens (2.0 gain) with vertical angle preservation
- Viewing angles optimized for fan-shaped seating (120-degree horizontal cone)
- Matte white surrounds to minimize contrast with bright environment
Confidence monitoring:
- Stage floor ultra-short-throw projectors (Epson LS500) for performer lyrics/notes
- Downward projection at musicians' stations
- Separate content feeds managed through AV system integration software (ProPresenter)
Integration architecture:
- Dante audio network for distributed sound reinforcement
- NDI video distribution for camera switching and projection feeds
- Unified control via iPad-based interface (Crestron Home)
- AV design automation enabled volunteer operators to manage complex system
Results: Vibrant, visible projection during Saturday evening and Sunday morning services regardless of natural lighting. Volunteer technical team successfully operates system with minimal training due to intuitive AV integration interface. Dual-projector redundancy prevented service interruption during single projector lamp failure incident.
Frequently Asked Questions: User Queries and Expert Answers
1. What is the ideal throw distance for a projector in an auditorium?
The ideal throw distance depends on your projector's throw ratio and desired screen size. For most auditoriums:
- Standard auditoriums (100-300 seats): 25-50 feet throw distance with 1.5:1 to 2.5:1 throw ratio
- Large auditoriums (300-800 seats): 50-90 feet with 3.0:1 to 6.0:1 throw ratio
- Mega venues (800+ seats): 90-150+ feet with 6.0:1 to 10:1 throw ratio
Use the formula: Throw Distance = Screen Width × Throw Ratio. Professional projector throw distance calculation should include a projection distance calculator to verify manufacturer specifications match your venue dimensions. Consider lens shift capabilities (typically +/- 50% vertical adjustment) to allow mounting flexibility without digital keystone correction.
2. How do I calculate screen size based on seating distance?
Apply these industry-standard formulas for screen size calculation:Minimum screen height = Closest viewing distance ÷ 3 (cinema quality) Minimum screen height = Closest viewing distance ÷ 1.5 (detailed content)Maximum viewing distance = Screen height × 6 (text legibility limit)Example calculation:
- Closest seat: 20 feet
- Farthest seat: 60 feet
- Minimum screen height: 20 ÷ 1.5 = 13.3 feet
- Verify maximum distance: 13.3 × 6 = 80 feet (exceeds 60-foot requirement ✓)
For 16:9 aspect ratio: Width = Height × 1.78
- Screen dimensions: 23.7 feet wide × 13.3 feet tall
Modern AV system design software incorporates these calculations with sightline modeling to ensure every seat maintains optimal viewing angles (within ±30 degrees horizontal, ±35 degrees vertical).
3. What's the difference between short-throw and long-throw projectors?
The distinction relates to throw ratio specifications:Short-throw projectors (0.4:1 to 1.0:1):
- Project large images from minimal distance
- Example: 10-foot screen from 4-10 feet away
- Advantages: Space efficiency, reduced shadows, lower ambient light interference on lens
- Limitations: More expensive, potential image distortion at edges, limited brightness scalability
- Best for: Small to medium venues, interactive displays, rear-projection setups
Long-throw projectors (2.0:1 to 10:1+):
- Require significant throw distance for screen size
- Example: 10-foot screen from 20-100 feet away
- Advantages: Superior image uniformity, better integration with auditorium architecture, projection lens interchangeability
- Limitations: Require rear mounting space, potential obstruction by audience
- Best for: Large auditoriums, theaters, houses of worship, sports arenas
Standard throw (1.0:1 to 2.0:1) represents the middle ground suitable for most general-purpose applications. Professional AV integration often specifies long-throw systems for permanent installations due to superior optical performance and flexibility.
4. How much brightness (lumens) do I need for my auditorium projector?
Brightness requirements depend on screen area, ambient light conditions, and content type:Formula: Required ANSI lumens = (Screen area in sq ft × Ambient light in foot-candles × 2.5)General guidelines:Controlled lighting environments (blackout capability, 5-10 foot-candles):
- Small screens (
- Medium screens (100-200 sq ft): 5,000-8,000 lumens
- Large screens (200-400 sq ft): 8,000-15,000 lumens
Moderate ambient light (dimmable lights, 15-25 foot-candles):
- Small screens: 5,000-8,000 lumens
- Medium screens: 8,000-12,000 lumens
- Large screens: 12,000-20,000 lumens
High ambient light (daylight/minimal control, 30-50 foot-candles):
- Small screens: 8,000-12,000 lumens
- Medium screens: 12,000-20,000 lumens
- Large screens: 20,000-40,000+ lumens
Add 20-30% safety margin for lamp aging and dust accumulation. High-screen gain materials (1.3-2.0) can reduce lumens requirements but narrow viewing angles. Professional auditorium projection setup typically specifies commercial-grade projectors with sustained brightness ratings rather than peak specifications.
5. What role does AV system integration software play in projection planning?
AV system integration software transforms projection design from educated guesswork to precision engineering:Core capabilities:3D venue modeling: Import architectural drawings or create venues from measurements, visualizing projector placement options in 3D space with photorealistic rendering.Automated calculations: Input projector specifications, and software computes compatible throw distances, screen sizes, lens types, and mounting positions instantly.Sightline analysis: Simulate views from every seat position, identifying obstructions and verifying viewing angles meet standards.Brightness modeling: Calculate ANSI lumens distribution across screen surface, accounting for throw distance, lens type, and ambient light conditions.Equipment comparison: Compare multiple projector models side-by-side with cost analysis, performance metrics, and compatibility ratings.Popular platforms:
- D-Tools System Integrator (SI): Comprehensive project management with proposal generation
- EASE Focus 3: Specialized in large-venue acoustic and projection modeling
- Crestron Toolbox: System configuration for Crestron control integration
- Vectorworks Spotlight: Entertainment industry standard with projection mapping capabilities
Benefits: Reduces installation errors by 80%, accelerates design timeline, enables client visualization before commitment, facilitates manufacturer specification compliance, and generates accurate material lists for procurement.
6. How do I account for audience viewing angles in screen positioning?
Viewing angles critically impact perceived image quality and viewer comfort:Horizontal angle standards:
- Optimal zone: ±20 degrees from screen center (best color accuracy, brightness, geometry)
- Acceptable zone: ±30 degrees (minor color shifting, acceptable for most content)
- Marginal zone: ±30 to ±45 degrees (noticeable distortion, suitable only for overflow seating)
Calculation: Measure perpendicular distance from seat to screen, then lateral offset distance. Angle = arctan(offset ÷ perpendicular distance)Vertical angle standards:
- Preferred: Screen center at viewer's eye level (±10 degrees)
- Acceptable: Up to 35 degrees upward viewing angle from horizontal
- Problematic: Beyond 35 degrees causes neck strain during extended viewing
Mitigation strategies:Curved seating arrangement: Fan-shaped layouts reduce maximum horizontal angles compared to rectangular configurations.Screen size optimization: Larger screens reduce relative angular distortion for edge seats.
Elevated screen positioning: Raising screen above floor level (3-5 feet typical) improves sightlines for front rows while maintaining vertical angles for rear rows.
Tiered seating: Raked floors with 6-8 inch risers per row dramatically improve vertical viewing angles and reduce row-to-row sightline obstructions.
Multiple screens: Very wide venues may benefit from dual side screens angled toward seating sections rather than single central screen, though this requires video processing for synchronized content.Professional AV design software generates "viewing angle heatmaps" color-coding seats by viewing quality, enabling data-driven seating layout design optimization.
7. What are the most common mistakes in auditorium projection planning?
Based on 20+ years of professional AV installation experience, these errors frequently require expensive remediation:1. Insufficient brightness specification:
- Mistake: Selecting projectors based on manufacturer "peak" lumens rather than sustained operational brightness
- Consequence: Dim, washed-out images especially in ambient light
- Solution: Specify commercial projectors rated by ANSI standards, adding 20-30% headroom for aging
2. Ignoring throw distance constraints:
- Mistake: Specifying desired screen size before confirming available throw distance and compatible throw ratio
- Consequence: Discovering no projector exists with required specifications or necessitating expensive structural modifications
- Solution: Begin with projector throw distance calculation based on actual venue geometry, then determine feasible screen sizes
3. Inadequate viewing angle analysis:
- Mistake: Focusing only on center seating while ignoring edge seat perspectives
- Consequence: Substantial portion of audience experiences distorted, uncomfortable viewing
- Solution: Use AV system design software to model perspectives from worst-case seat positions, adjusting screen placement accordingly
4. Overlooking ambient light impact:
- Mistake: Specifying projectors based on screen size alone without measuring ambient light conditions
- Consequence: Invisible or barely visible projection during daylight or with normal lighting
- Solution: Conduct lux measurements during typical usage times, apply brightness formula, specify auditorium lighting and shading control systems
5. Neglecting maintenance accessibility:
- Mistake: Mounting projectors in optimal optical positions without considering lamp replacement and cleaning access
- Consequence: Requiring lifts, scaffolding, or space closure for routine maintenance
- Solution: Factor 3-foot clearance spheres around projectors for technician access or specify motorized mounts with lowering capability
6. Poor screen material selection:
- Mistake: Defaulting to standard matte white screens regardless of ambient light or viewing angle requirements
- Consequence: Hotspotting with high-screen gain materials or insufficient brightness with low-gain screens
- Solution: Match screen gain to venue lighting and seating width, consider ambient light rejecting technologies for problematic spaces
7. Underestimating integration complexity:
- Mistake: Treating projection as standalone system rather than integrated component of audio visual environment
- Consequence: Incompatible control systems, unsynchronized lighting and shading control, poor signal routing
- Solution: Engage experienced AV integrator for holistic system design incorporating projection, audio, control, and lighting subsystems through AV system integration software
8. How does screen aspect ratio affect auditorium projection planning?
Aspect ratio selection impacts both aesthetic presentation and technical specifications:Common formats:16:9 (1.78:1) - Modern standard:
- Native format for HD, 4K, and 8K video content
- Matches computer displays and streaming media
- Most projectors' native aspect ratio
- Optimal for: Corporate presentations, educational content, video conferencing, general-purpose auditoriums
4:3 (1.33:1) - Legacy standard:
- Traditional computer and video format (pre-HD era)
- Still used for some scientific/medical imaging
- 33% taller than 16:9 for same width
- Optimal for: Medical/scientific venues with legacy content, dual-use spaces requiring both formats (with 16:9 "letterboxed" within 4:3)
2.35:1 (Cinemascope) - Cinema widescreen:
- Professional theatrical film format
- 32% wider than 16:9 for same height
- Creates immersive cinematic experience
- Optimal for: Dedicated film screening venues, performing arts theaters, auditoriums prioritizing cinematic content
Technical implications:Screen dimensions: Width = Height × Aspect Ratio
- 10-foot-tall screen: 16:9 = 17.8 ft wide, 4:3 = 13.3 ft wide, 2.35:1 = 23.5 ft wide
Throw distance impact: Wider screens require proportionally longer throw distances for same throw ratio
- 16:9 screen at 2.0:1 throw: 17.8 ft × 2.0 = 35.6 ft
- 2.35:1 screen at 2.0:1 throw: 23.5 ft × 2.0 = 47 ft (32% additional throw distance)
Content compatibility: Mismatched content creates black bars (letterboxing/pillarboxing) reducing effective image area and brightness efficiency
Cost considerations: Larger screens (wider aspect ratios) require more expensive materials and potentially higher brightness projectors for equivalent image quality
Recommendation: Most modern auditoriums should specify 16:9 aspect ratio as primary format, with video processors handling alternative formats through intelligent scaling. Dedicated cinema venues warrant 2.35:1 screens with masking systems for occasional 16:9 content.
Conclusion
Selecting the optimal screen size based on auditorium throw distance and seating layout requires balancing technical specifications, spatial constraints, budget realities, and user experience priorities. Success in auditorium projection planning stems from systematic analysis beginning with accurate venue documentation and projector throw distance calculation, proceeding through careful screen size calculation based on viewing distance standards, and culminating in holistic AV system integration that coordinates projection with lighting, audio, and control subsystems.
The formulaic approaches detailed throughout this guide from throw ratio calculations to brightness requirements to viewing angle optimization provide frameworks for decision-making, but real-world installations demand flexibility and experience. AV system integration software and auditorium throw distance calculator tools accelerate design iterations while reducing errors, yet cannot substitute for comprehensive understanding of optical principles, environmental factors, and application-specific requirements.
Key takeaways for successful implementation:
1. Prioritize viewing experience: Every specification decision should ultimately serve audience members' ability to comfortably view content from their specific seat positions. Viewing angles, screen size calculation, and brightness all contribute to this primary objective.
2. Measure meticulously: Projector throw distance calculation demands precision. Small measurement errors multiply through optical formulas, potentially rendering equipment incompatible with installations. Professional site survey and throw analysis prevents costly mistakes.
3. Account for ambient light: Perhaps the single most underestimated factor in projection quality. ANSI lumens specifications, screen gain, and auditorium lighting and shading control integration must address venue-specific ambient light conditions during typical operational periods.
4. Plan for flexibility: Projection lens interchangeability, lens zoom range, and motorized lens shift provide valuable adaptability as venue usage evolves. Initial investment in versatile equipment prevents premature obsolescence.
5. Integrate holistically: Projection systems don't operate in isolation. Coordination with audio-visual integration components, building management systems, and architectural elements through comprehensive AV design software ensures seamless operation and user satisfaction.
6. Engage expertise: While DIY approaches suit small spaces, professional auditoriums benefit enormously from experienced AV integrators who navigate complex specifications, coordinate trades, and ensure installation compliance with industry standards and local codes.
The convergence of advanced digital projectors with higher brightness and resolution, sophisticated AV system design software for precision planning, and innovative screen materials engineered for challenging ambient light scenarios has elevated auditorium projection to unprecedented quality levels. Yet these technological capabilities only deliver value when deployed through informed planning processes that respect fundamental optical principles and human factors considerations.
Whether designing a 50-seat corporate presentation room or a 2,000-seat performing arts center, the methodologies outlined here grounded in physics, informed by standards bodies, validated through real-world case studies, and enabled by modern design tools provide pathways to exceptional results. Invest the time in proper projector throw distance calculation, comprehensive seating layout design analysis, and thoughtful audio-visual integration, and your auditorium will deliver engaging, comfortable viewing experiences that serve users effectively for decades.